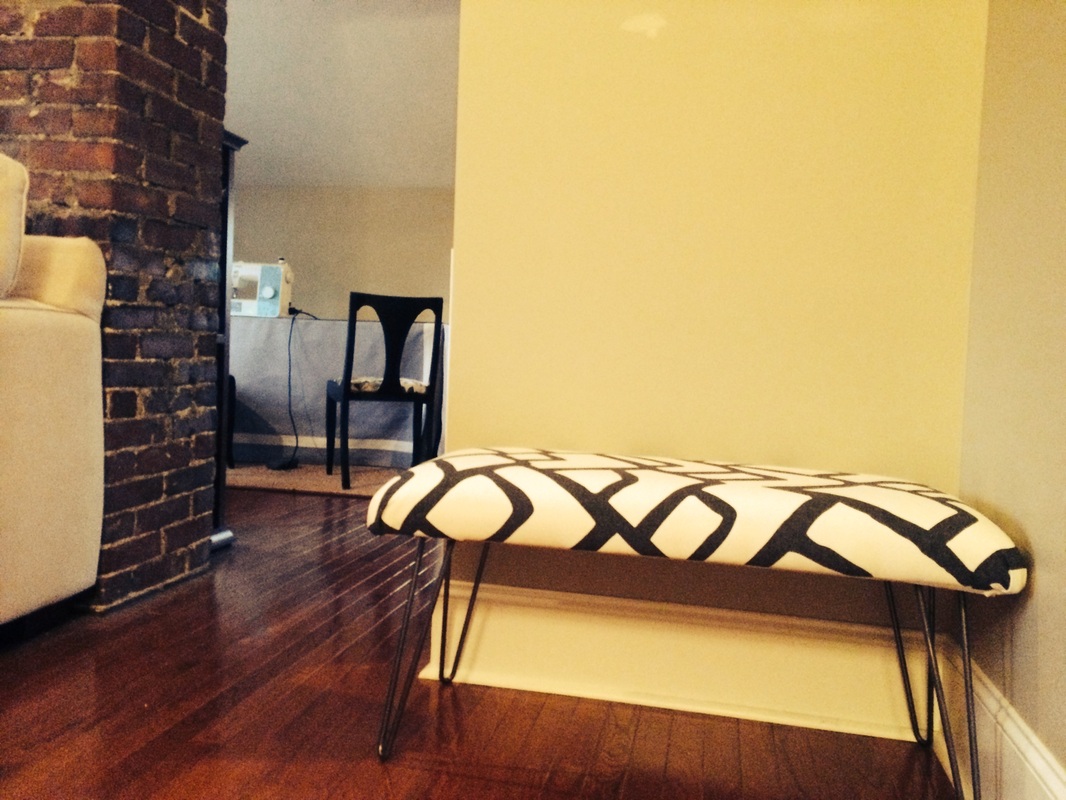
Upholstered Hairpin leg Bench. Check. I actually did not find any tutorials for this online, there were hairpin bench ones, but not with an upholstered top. So, I have spent some time on this tutorial.
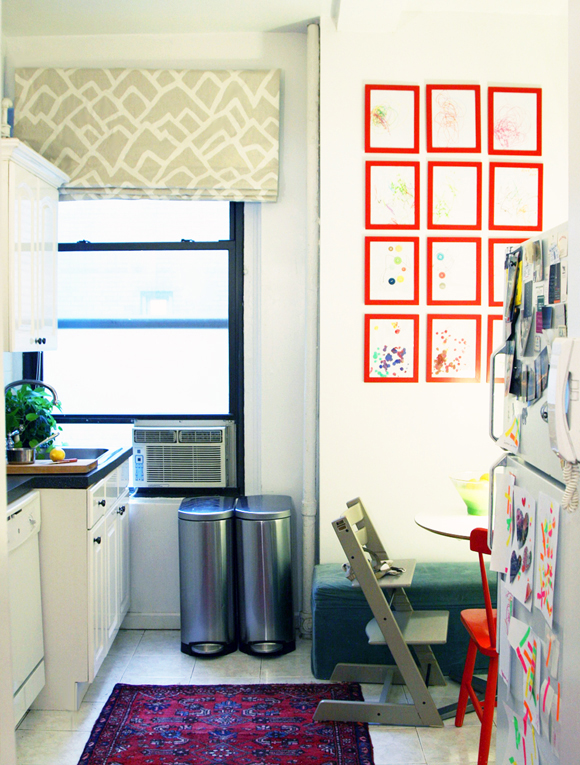
This is a before picture of what it looked like at the top of our stairs. Kind of random, and really brown. So, the plan was to add a bench with storage and a large mirror on top.
This is a before picture of what it looked like at the top of our stairs. Kind of random, and really brown. So, the plan was to add a bench with storage and a large mirror on top.
I knew that I wanted a bench with some storage baskets tucked under it. First idea, as always, repurpose a piece on Craigslist. However, I wanted the bench to fit the exact measurements of the space. So, next plan... build a bench. I did not want an all wood bench. I wanted something upholstered and with metal legs. After researching metal leg options, we first decided to go with a bench built from plumber parts. I found this great tutorial online from Lowe's seen here and we thought awesome, this is a dirt cheap project with an industrial twist. However, after buying all the 16 plus parts, I left Home Depot with a bill of around $110. That was not what I had in mind and while I liked the plumber parts pipe idea, I didn't like it that much. Here is a picture of the industrial frame. So, I decided to go with hairpin legs, which was what I like the most from the beginning!! I'm telling you people, trust your gut here.
Step 1: Order Legs. So, I had been interested in hairpin legs. Brian was not for them as he was afraid they would scratch the wood floors. After deliberation, we decided they were the best option because we loved the look and knew that the bench would not move around all that much. Hairpin legs appear on many sites, including etsy and they range in price. I researched and decided that hairpinlegs.com was they way to go. So, I ordered 14 inch legs and my grand total was $40, now that is more like it. They are great quality and perfect height for kids and to fit baskets underneath.
Step 2: Have Home Improvement Store cut your wood, and if desired, paint the bottom of bench. You need your base and some supports. I went to Home Depot and bought a piece of 48 inch 3/4 inch thick mdf. I had Home Depot cut it to my width of 15 inches, but Brian ended up cutting the length because I wasn't sure at the time. So he cut it 35 inches long. Brian then used the left over wood and cut a smaller piece for a bottom support. See, I didn't realize this, but unless your wood is SUPER thick, it needs support under it or else it will sink when you sit on it. Kind of makes sense now that I write it down. Duh. So, you need to put the support wood under the base wood with wood glue. Our support piece of wood was about 25% smaller than the base of the bench. However, some people use several small strips of wood and glue them to the bottom. Whatever you decided, it is a good decision to add it. Then I painted the bottom of the bench white.
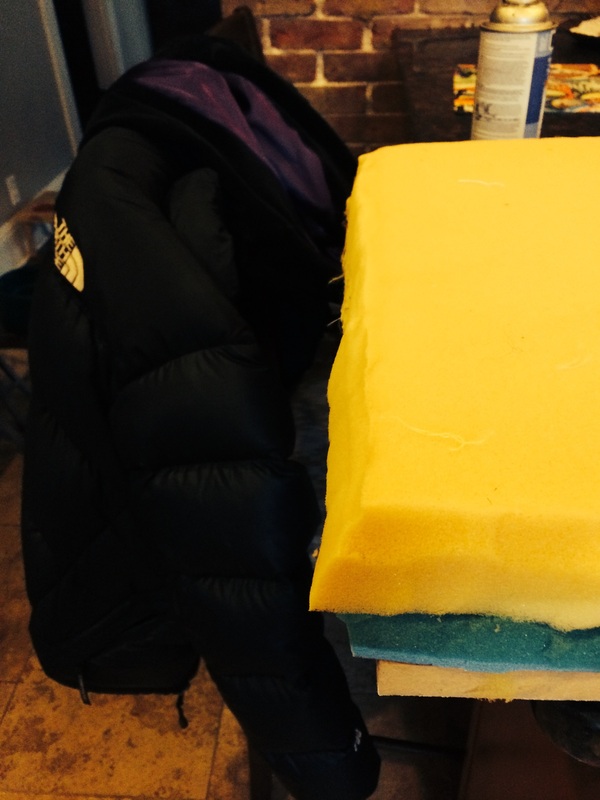
Step 3: Add your padding and foam. Unfortunately, for those people wanting to build a bench, foam is expensive. I saw tutorials that used pillow fill, but those looked lumpy and not professional. So, normally, I would have gone to Jo Ann's and used my coupons. However, my foam story is lucky and embarrassing. We had donated an old ottoman to Goodwill that I built 10 years ago. Everytime I went into Goodwill, I saw said ottoman. They had priced it at $40.00, which was a compliment to me, but it was not getting sold. Well, the last time I went in, I thought, I want the foam out of there! I talked to the manager and she gave the ottoman back to me. I brought said ottoman home, fished out all the expensive foam, and then we got rid of it for a second time. Whew.
Before placing the foam down, I glued an old camping sleeping mat to the mdf. Get creative here people :). I cut the mat and the foam with regular scissors, razor blade was not getting it done. You need to use spray adhesive to attach these pieces. Ideally, you attach a piece of batting over all of this. Well, I had some very thin foam from my old ottoman that I wrapped on top of and on the sides of the larger foam and sleeping mat. This steps helps smooth everything out.
Step 2: Have Home Improvement Store cut your wood, and if desired, paint the bottom of bench. You need your base and some supports. I went to Home Depot and bought a piece of 48 inch 3/4 inch thick mdf. I had Home Depot cut it to my width of 15 inches, but Brian ended up cutting the length because I wasn't sure at the time. So he cut it 35 inches long. Brian then used the left over wood and cut a smaller piece for a bottom support. See, I didn't realize this, but unless your wood is SUPER thick, it needs support under it or else it will sink when you sit on it. Kind of makes sense now that I write it down. Duh. So, you need to put the support wood under the base wood with wood glue. Our support piece of wood was about 25% smaller than the base of the bench. However, some people use several small strips of wood and glue them to the bottom. Whatever you decided, it is a good decision to add it. Then I painted the bottom of the bench white.
Step 3: Add your padding and foam. Unfortunately, for those people wanting to build a bench, foam is expensive. I saw tutorials that used pillow fill, but those looked lumpy and not professional. So, normally, I would have gone to Jo Ann's and used my coupons. However, my foam story is lucky and embarrassing. We had donated an old ottoman to Goodwill that I built 10 years ago. Everytime I went into Goodwill, I saw said ottoman. They had priced it at $40.00, which was a compliment to me, but it was not getting sold. Well, the last time I went in, I thought, I want the foam out of there! I talked to the manager and she gave the ottoman back to me. I brought said ottoman home, fished out all the expensive foam, and then we got rid of it for a second time. Whew.
Before placing the foam down, I glued an old camping sleeping mat to the mdf. Get creative here people :). I cut the mat and the foam with regular scissors, razor blade was not getting it done. You need to use spray adhesive to attach these pieces. Ideally, you attach a piece of batting over all of this. Well, I had some very thin foam from my old ottoman that I wrapped on top of and on the sides of the larger foam and sleeping mat. This steps helps smooth everything out.
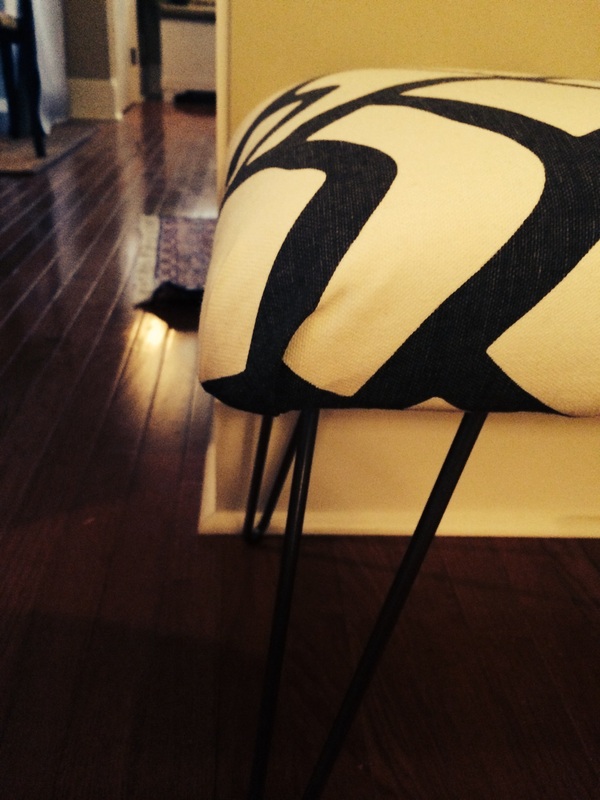
You can also see where I cut in with a razor blade on the foam to make the bench less boxy.
Step 4: Start Stapling. First, I stapled an inexpensive piece of white fabric onto the bench as a lining. I really recommend this step as it further helps smooth everything out. I also recommend having someone help you with this step, someone to pull and tug that fabric with. We folded under the edges of the fabric before stapling to make it a cleaner look. Brian kept asking, how hard should I pull, I am puckering this thing. If you are REALLY strong, pull at 40% strength, for normal people, pull at 70%.
Step 4: Start Stapling. First, I stapled an inexpensive piece of white fabric onto the bench as a lining. I really recommend this step as it further helps smooth everything out. I also recommend having someone help you with this step, someone to pull and tug that fabric with. We folded under the edges of the fabric before stapling to make it a cleaner look. Brian kept asking, how hard should I pull, I am puckering this thing. If you are REALLY strong, pull at 40% strength, for normal people, pull at 70%.
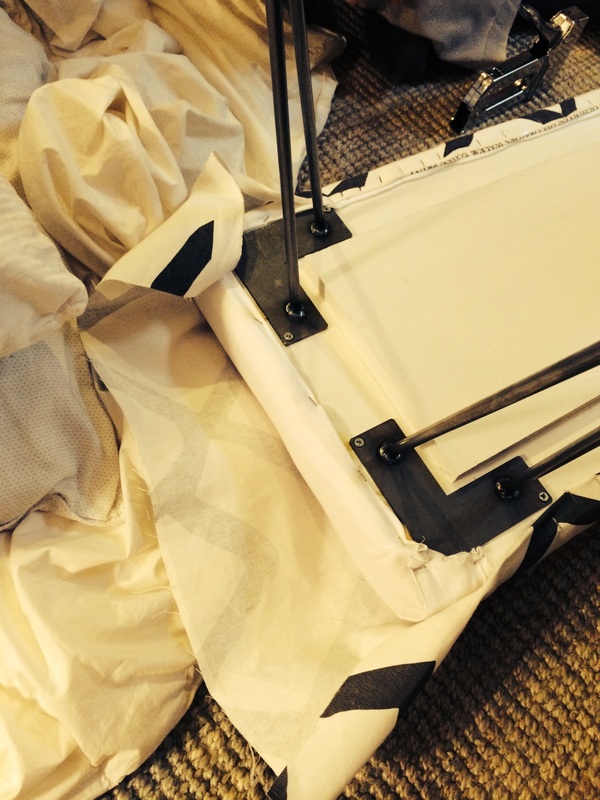
Finally, the Corners. The stapling went fairly quick except for the corners. We followed Jenny's method of the Little Green Notebook, found here. Brian actually did the corners because he is the perfectionist in our relationship. They turned out splendid. Here is the final product. We couldn't be happier.


 RSS Feed